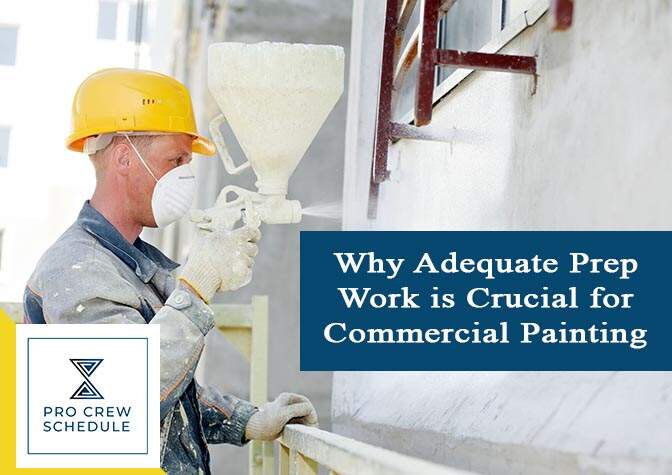
The main secret to an excellent commercial paint job is that the majority of the work is already done even before the topcoat is applied. The primary reason prep work or surface preparation is crucial in any of your commercial painting services because paint cannot adhere to unprepared surfaces. The paint usually peels on its own, bubble up, crack and flake because it cannot stick tightly to the surface.
About to paint your client’s commercial property? Before you grab rollers and brushes, make sure to take enough time for surface preparation. Full surface preparation includes cleaning, sanding, repairing, masking, patching, and priming. The whole procedure may be time-consuming, but then again, it’s a vital step. Bear in mind that eighty percent of paint failures are actually due to improper surface prep work.
As a commercial painting contractor, you have to prioritize proper preparatory work. In this blog, we’re going to discuss the reasons behind why prep work is fundamental and will give you practical tips that’ll help you in preparing this procedure.

What is Prep Work, and why is It Important?
Surface preparation may be a very time-consuming job, but it is one of the first crucial stages to adhere to. Depending on the size of the building, it may take a long while before the primary coat of paint is being applied. The paint application on a particular prepared surface is a better solution when issues arise. A single coat of paint is the only requirement to disclose any glaring and exposed flaws, including grime, tiny holes, flaking, peeling paint, cracks and tiny holes, which can end with a poor finish.
There are vital steps to follow in preparing the surface before paint is applied to attain a flawless and spotless commercial paint job. To manage a project like this, you should never rush the surface preparation process because it will crack the paint, resulting in a disaster. You may find yourself starting over again due to your lack of patience.
Here’s what actual surface prepping involves that you need to take seriously:
1. Protecting Surface and Items
Any object or surface that will not be painted must be either removed or covered. Any portable furnishings must be relocated during the painting process. Also, other stationery items such as heavy appliances, thick carpets and furniture must be completely covered with tarps. In fact, painters tape will be going to protect areas that cannot be painted, like:
- Windows
- Hardware
- Gutters
- Utility heads
- Outlet boxes
- Racks
- Hose bibs
2. Power Washing
The exterior surface of the commercial building should be thoroughly cleaned before the paint application. The only best way to clean any commercial buildings is to power wash them, whether small or huge. In fact, power washing can remove surface contaminants while using pressurized water that is purposely heated to a rising temperature.
The hot temperature of the water ensures that all the contaminants and grime are broken down. Here are the following surface contaminants typically found on the surfaces of commercial buildings:
- Dust/mud
- Mod/mildew
- Rust
- Dirt
- Peeling or Loose paint
- Algae
- Debris
- Oil
- Moss
- Salts
- Grease
- Graffiti
Remember: A clean surface is necessary for better paint adhesion. If this stage of the preparation isn’t done the right way, the paint is going to be applied directly to the dirt instead of on the actual surface. As a result, an uneven surface is made, and everyone knows it won’t even last. Monitoring this particular phase is one of the project manager’s duties. Invest any construction techs today like Pro Crew Schedule to experience an easier way of scheduling tasks, project planning, and tracking hours and performance.
3. Let it Dry
Not only does paint not firmly stick to dirty surfaces, but it doesn’t also adhere well to any damp and wet surfaces. Right after the building is cleaned, most especially if you have power washed it, and it stays moist for several days. Ensure to allow a couple of days for the entire surface to fully dry before doing the next step.
Commercial painting contractors are tasked to manage projects and their members. Investing in advanced software solutions will help them overcome the odds and complexities in executing such projects. Prep work may look like a less complicated job, but it requires extra effort. Hence, working with other team members should be smooth and more productive to obtain excellent results. Only you can achieve this when there’s project management for construction.
4. Scrape it off
All peeling and loose paint needs to be scraped off. The surfaces and walls on the buildings must only have a bare surface area or well-adhered paint. If you leave cracked or loose paint anywhere on the commercial building, your paint job will be a complete disaster, a failure.
Moreover, heavy-duty scraping jobs often require a strong blade, an extremely-strong handle with a powerful cap, and a beefy blade clamp. These types of scrapers will do the work of eliminating peeling paint go much faster. Removal of paint may go well using these certain scrapers. But only a scraper with replaceable blades is good to use when it becomes dull.

5. Caulking
If there are seams in the building or you found cracks at the joints, applying new caulking will eventually solve the issue. Caulking prevents water from getting to the inside building. Water potentially causes damage to the building structure and its contents. But with caulking, the problem is solved, making the paint look more uniform.
But if there’s already existing caulking, it is advised to dig out first from the joints before applying new caulking. All gaps and sliding joints need to be sealed right away to keep moisture and water out.
6. A smooth surface
This procedure often involves sanding down all rough exposed woods, including feather-sanding the edge of the remaining paint that can be found on the surface. In smoothening the surface, using an electric sander is necessary, especially if it’s a wide surface. Otherwise, small paper or blocks will work. However, if the surface is very rough, you’ll have to start sanding first with the medium grit, making sure to finish the fine grit. You can skip immediately straight to the fine if the surface is not too rough.
After the whole surface has been sanded down, the dust forms from the sanding will have to be removed to let the paint stick. Removal of debris and dust can be done in many different ways.
- Blow it off using an air compressor.
- You can wipe it all down using clean rags.
- Give it rinse with a pressure washer or garden hose.
If you use water, you need to wait until it’s fully dry before applying primer or paint. Commercial painters usually work as a team. Therefore, contractors need to implement construction crew management combined with construction tech deployment. Doing so will create a more positive and unified environment for everyone, where collaboration increases resulting in excellent outcomes.
Additional Surface Fixes You Need to Notice
After a good power wash and old paint removal, more damage may be started to reveal. Some wall areas of the building surface may have holes and dents. If the surface is made of wood, rotting or splitting wood might show. Other issues that need immediate attention are:
- Rusty Metal – this is alleviated by cleaning off powdery surface rust and flakes using a wire brush. If the brush you use doesn’t do its job, you can use a drill with a cable wheel to remove the rust. Next, apply a primer that adheres to any rusted surfaces.
- Rotting Wood – The black or gray discoloration can be sanded away. If the wood is softer, you need to dig out shallow spots and fill it with an exterior filler. However, if the rotting is already widespread, you need to replace the whole piece of wood.
- Concrete wood – dented surfaces, blemishes and holes quickly need a cement patching compound in order to fill in the dents.
- Wood Surface/Components – air pockets, holes, cracks, gaps and other voids can be fixed with a wood filler.
Commercial painting contractors must prepare, especially when having many painting jobs. Depending on the activities that will take place in the building, using subcontractor scheduling software like Pro Crew Schedule will be a great solution to manage every single task. For instance, during prep work, it’ll be easier to schedule specific tasks, allowing contractors to monitor crew members and track their performance.
Pro Crew Schedule provides a seamless cloud-based platform with various project management features. It makes work less complicated, creating a harmonious and collaborative environment for you and your crew members—experience Pro Crew Schedule in a live demo for FREE.
Key Takeaways
The secret to flawless paint finish is proper surface prep. The time spent on surface preparation will pay off later with an excellent commercial paint job that will last for many years. It is the job of Commercial Pro Painter to handle every phase of the prep work with ease and competence, dedicated in providing the best quality results and excellent service.